
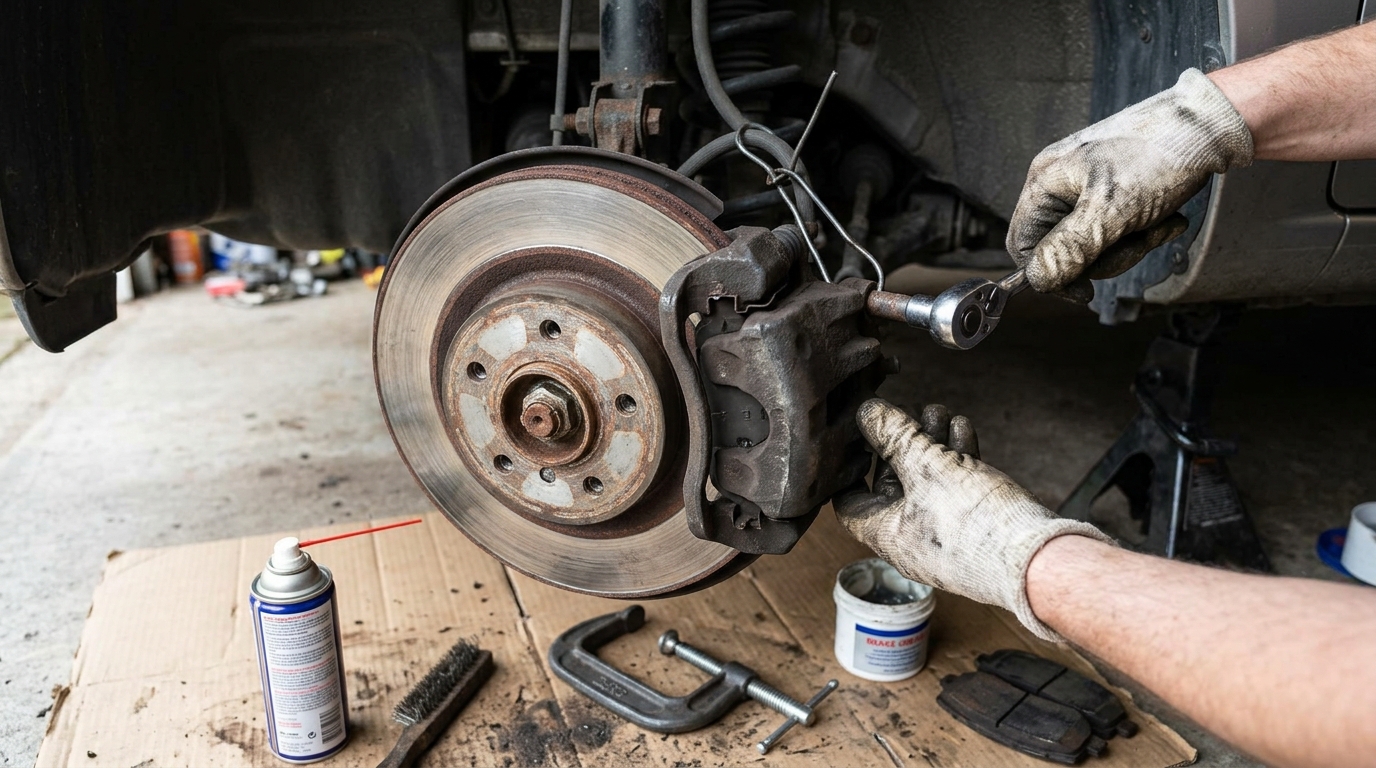
Are you tired of dealing with a stubborn brake caliper that just won’t cooperate? If so, you’re in the right place! In this guide, we’ll walk you through the steps to fix a stuck brake caliper, allowing you to regain control and ensure your vehicle’s safety on the road. Keep reading to learn the tips and tricks to get your brakes working smoothly again.
Symptoms of a Stuck Brake Caliper
Brake calipers play a crucial role in the braking system of a vehicle, and when one becomes stuck, it can lead to various noticeable symptoms. One of the most common signs of a stuck brake caliper is uneven braking, where the vehicle may pull to one side when braking. This occurs because the caliper fails to release properly, causing uneven pressure on the brake pads. Another symptom is excessive heat coming from one wheel after driving, as the stuck caliper causes increased friction and heat buildup. Additionally, a vibrating or pulsating sensation while braking can indicate a stuck caliper, as the uneven braking pressure affects the smooth operation of the brakes.
Furthermore, a stuck brake caliper can result in accelerated wear on the brake pads and rotors of the affected wheel. This can lead to a decrease in braking performance, longer stopping distances, and potential safety hazards. Recognizing these symptoms promptly and addressing a stuck brake caliper issue is crucial to ensure the continued safe operation of the vehicle.
Tools and Materials Needed
When fixing a stuck brake caliper, you will need a few tools and materials to successfully complete the task. Here are the essential items you should have on hand:
1. Jack and Jack Stands: To lift the vehicle safely and securely, a jack and jack stands are necessary. Make sure to follow proper procedures to avoid accidents.
2. Lug Wrench: This tool is essential for removing the lug nuts holding the wheel in place. Choose the correct size that fits your vehicle’s lug nuts.
3. C-Clamp: A C-clamp or brake caliper tool is needed to compress the caliper piston when replacing brake pads or working on the caliper assembly.
4. Brake Cleaner: Keeping the brake components clean is crucial. Brake cleaner helps remove dirt, grime, and brake dust from the caliper, pads, and rotor surfaces.
5. Brake Grease: Lubricating the caliper slides and contact points with brake grease ensures smooth operation and prevents binding or sticking of the caliper.
6. Replacement Parts: Depending on the issue with the brake caliper, you may need replacement parts such as brake pads, caliper pins, or caliper rebuild kits.
Step 1: Lift the Vehicle
Lifting the vehicle is the first step in addressing a stuck brake caliper. To do this safely, use a floor jack and jack stands to elevate the car off the ground. Make sure the vehicle is on a level surface and engage the parking brake before lifting. Place the jack under the recommended jacking point, typically located near the front or rear of the vehicle.
Slowly raise the vehicle until the wheels are off the ground. Once the car is lifted, secure it with jack stands for added safety. It is essential to follow the manufacturer’s guidelines for lifting the vehicle, as incorrect placement of the jack could cause damage to the car or, worse, lead to an accident.
Step 2: Remove the Wheel
Removing the wheel is the next step in fixing a stuck brake caliper. Start by loosening the lug nuts while the vehicle is still on the ground. Then, lift the vehicle using a jack and secure it with jack stands for safety. Completely remove the lug nuts and take off the wheel carefully. Place the lug nuts in a safe spot where they won’t get lost.
With the wheel out of the way, you will have better access to the brake caliper and rotor. Inspect the area for any visible signs of damage or wear. This step is crucial for identifying the root cause of the brake caliper issue. Once you have inspected the brake caliper and rotor, you can proceed with the necessary repairs or maintenance to address the stuck brake caliper problem.
Step 3: Inspect the Brake Caliper
Inspecting the brake caliper is a crucial step in diagnosing the issue of a stuck brake caliper. Begin by visually examining the caliper for any signs of damage or corrosion. Look for any leaks around the caliper piston or brake hose connections. Check the brake pads for uneven wear, as this could indicate a problem with the caliper not applying pressure evenly. Additionally, make sure the caliper slides freely on its mounting bracket without any obstruction.
If the caliper appears to be in good condition externally, you may need to remove it for a closer inspection. Inspect the caliper piston for any signs of rust, corrosion, or fluid leaks. Check the condition of the seals around the piston and replace them if necessary. Ensure that the caliper slides smoothly and that the piston retracts properly when the brake pedal is released. Identifying any issues at this stage will help determine the extent of the repairs needed to fix the stuck brake caliper.
Step 4: Fixing the Stuck Brake Caliper
Fixing a stuck brake caliper requires careful attention to detail and following a systematic approach. Start by loosening the caliper mounting bolts to remove the caliper from the brake assembly. Inspect the caliper for any signs of damage or corrosion that may be causing it to stick. If the caliper is heavily corroded, it may need to be replaced entirely.
Next, check the caliper slide pins for proper lubrication and smooth operation. Clean the slide pins thoroughly and apply high-temperature brake grease before reinserting them into the caliper bracket. Ensure that the caliper piston moves freely by gently compressing it back into the caliper using a C-clamp or piston compression tool. Once everything is reassembled, bleed the brake system to remove any air bubbles and test the brakes to ensure they are functioning correctly.