
Have you ever felt that sinking feeling when the check engine light suddenly illuminates on your dashboard? The uncertainty, the worry, the frustration of not knowing what’s wrong with your car. But fear not! In this post, we will guide you through the process of diagnosing a check engine light, demystifying the complexities and empowering you to take control of the situation. So sit back, relax, and let’s delve into the world of automotive diagnostics together.
Common Causes of a Check Engine Light
A check engine light can be a concerning indicator of potential issues with your vehicle. While the specific reasons can vary depending on the make and model of your car, there are some common causes that drivers should be aware of. One frequent culprit is a loose or damaged gas cap, which can trigger the light to come on. Other common causes include issues with the oxygen sensor, catalytic converter, spark plugs, or ignition coils.
Additionally, a check engine light may illuminate due to problems with the mass airflow sensor, fuel injectors, or the exhaust gas recirculation (EGR) valve. Ignoring the light can lead to worsened fuel efficiency, potential damage to the engine, or even safety hazards. It is crucial to address the underlying cause promptly to prevent further complications and ensure the proper functioning of your vehicle.
3. How to Use an OBD-II Scanner
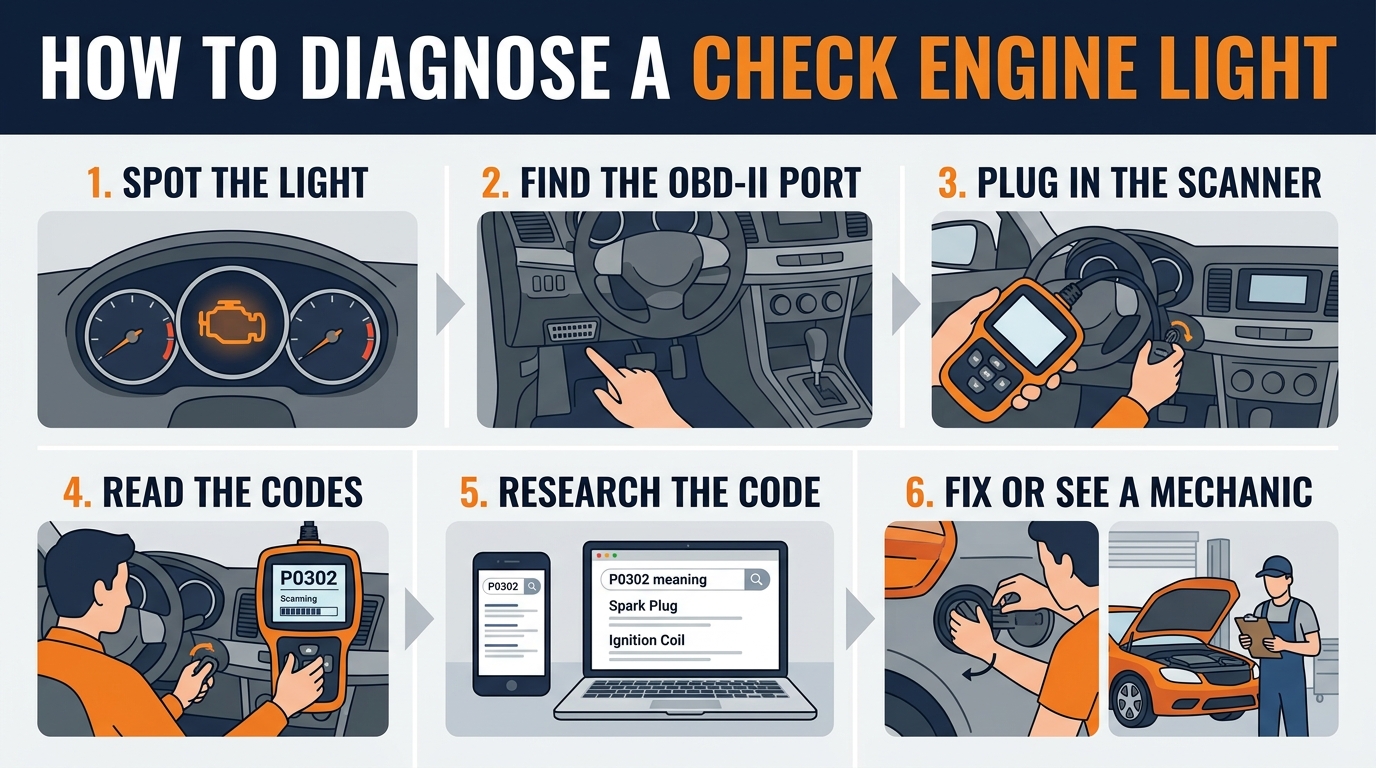
Using an OBD-II scanner to diagnose issues with your vehicle is a straightforward process that can save you time and money. First, locate the OBD-II port in your car, usually found under the dashboard near the driver’s seat. Plug the scanner into the port and turn on your vehicle’s ignition without starting the engine. The scanner will power on and prompt you to enter the vehicle’s VIN number or select the make and model manually.
Once the scanner is connected and powered on, navigate through the menu options to find the “Scan” or “Read Codes” function. This will initiate the scanning process, where the scanner communicates with your vehicle’s onboard computer to retrieve any stored diagnostic trouble codes (DTCs). After the scan is complete, the scanner will display the codes along with a brief description of the issue. Take note of the codes, and refer to the scanner’s manual or online resources to interpret them and determine the necessary steps to address the problem.

Interpreting Diagnostic Trouble Codes
Diagnostic Trouble Codes (DTCs) are codes generated by your vehicle’s onboard computer system to indicate issues with various components. When using an OBD-II scanner to retrieve DTCs, it’s important to understand how to interpret them. Each DTC consists of a five-character code that provides information about the specific problem detected.
Upon retrieving a DTC, you can cross-reference it with a list of codes specific to your vehicle or use online resources to determine the meaning. DTCs can range from minor issues like a loose gas cap to more serious problems with the engine or emissions system. Understanding and interpreting these codes correctly can help you diagnose and address the underlying issues effectively.
5. Checking and Replacing the Gas Cap
Checking the Gas Cap: One common but often overlooked reason for a check engine light is a loose or faulty gas cap. A loose gas cap can cause fuel vapors to escape from the fuel tank, triggering the check engine light. To check the gas cap, simply ensure it is securely tightened after refueling. Additionally, inspect the rubber seal on the cap for any signs of wear or damage that may prevent a proper seal.
Replacing the Gas Cap: If you find that the gas cap is damaged, cracked, or not sealing properly, it is crucial to replace it promptly. A faulty gas cap can lead to decreased fuel efficiency and potentially more serious issues with the vehicle’s emissions system. When replacing the gas cap, be sure to purchase a compatible replacement cap from your vehicle’s manufacturer or a reputable auto parts store. Install the new cap securely to ensure a proper seal and prevent any check engine light issues related to the gas cap.
6. Inspecting the Spark Plugs
Regular inspection of the spark plugs is crucial for maintaining the performance and efficiency of your vehicle’s engine. Spark plugs play a key role in igniting the air-fuel mixture in the combustion chamber. Over time, spark plugs can become fouled, worn out, or develop deposits, which can lead to misfires, poor fuel economy, and rough idling. It is recommended to inspect the spark plugs at regular intervals as part of routine maintenance to ensure they are in good condition.
To inspect the spark plugs, you will need to remove them from the engine using a spark plug socket and a ratchet. Once removed, visually inspect the spark plugs for any signs of damage, wear, or deposits. Check the gap between the electrode and the ground strap using a feeler gauge to ensure it is within the manufacturer’s specifications. If the spark plugs show any signs of wear or damage, they should be replaced with new ones to maintain optimal engine performance.
When to Seek Professional Help
Knowing when to seek professional help for your check engine light is crucial to ensure your vehicle’s safety and performance. If you have attempted basic troubleshooting steps such as checking the gas cap, inspecting the spark plugs, and using an OBD-II scanner, but the light remains illuminated, it may be time to consult a professional mechanic.
Additionally, if you notice other symptoms such as strange noises, rough idling, decreased fuel efficiency, or visible smoke coming from the exhaust, these could be signs of more serious issues that require expert diagnosis and repair. Ignoring these warning signs and continuing to drive with a persistent check engine light can lead to further damage and potentially costly repairs down the line. Therefore, it is best to err on the side of caution and schedule an appointment with a qualified mechanic to accurately diagnose and resolve the underlying problem.