
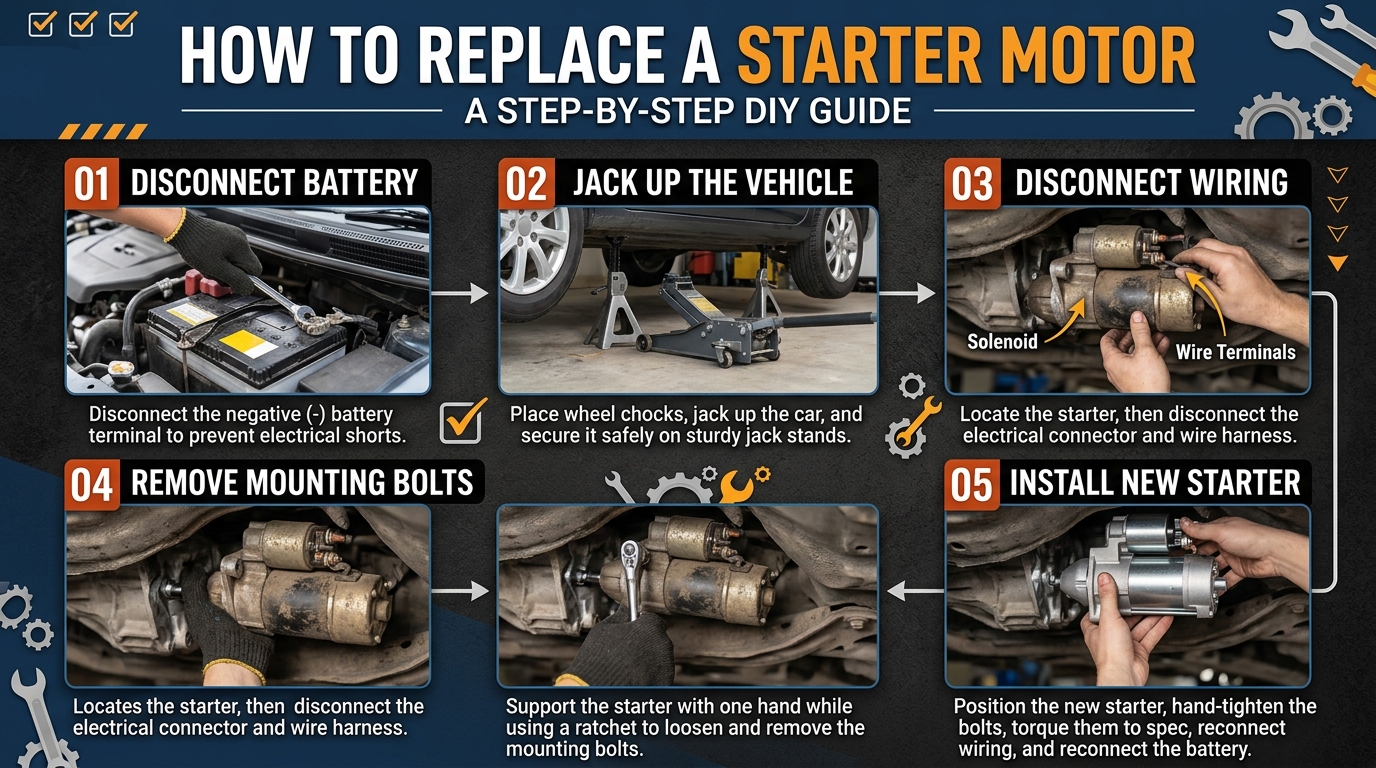
“Is your car having trouble starting up? Don’t worry, you may just need to replace the starter motor. Learning how to replace a starter motor can save you time and money, and give you the satisfaction of fixing your own vehicle. In this guide, we will walk you through the steps of replacing a starter motor, empowering you to take control of your car’s maintenance and get back on the road quickly.”
Symptoms of a Faulty Starter Motor
A faulty starter motor can cause various issues in a vehicle, often leading to frustrating and inconvenient situations for drivers. One common symptom is when you turn the key in the ignition, and the engine does not start or only starts intermittently. This could indicate a problem with the starter motor not engaging properly or failing to turn the engine over. Additionally, a grinding noise when starting the vehicle could point to worn-out gears within the starter motor, affecting its functionality. Another sign of a faulty starter motor is when the engine cranks slowly or struggles to start, indicating a lack of power from the motor to turn the engine efficiently.
Furthermore, if you experience smoke coming from the starter motor or notice a burning smell when attempting to start the vehicle, it is essential to address the issue promptly as it could indicate an overheating or electrical problem within the motor. Ignoring these symptoms can lead to complete starter motor failure, leaving you stranded and unable to start your vehicle.
Tools and Materials Needed
Replacing a starter motor requires a few essential tools and materials to ensure a smooth and successful process. Firstly, you will need a wrench set or socket set to loosen and remove the bolts holding the starter motor in place. A jack and jack stands will be necessary to safely lift and support the vehicle while you work underneath. Additionally, having a multimeter can help you test the electrical connections and ensure proper installation.
Other tools that will come in handy include a screwdriver set for removing any additional components blocking access to the starter motor, a cleaning cloth to wipe down the area before installation, and dielectric grease to protect the electrical connections from moisture and corrosion. Lastly, having a new starter motor that matches the specifications of your vehicle is crucial for a successful replacement.
Steps to Replace a Starter Motor
1. Disconnect the Battery
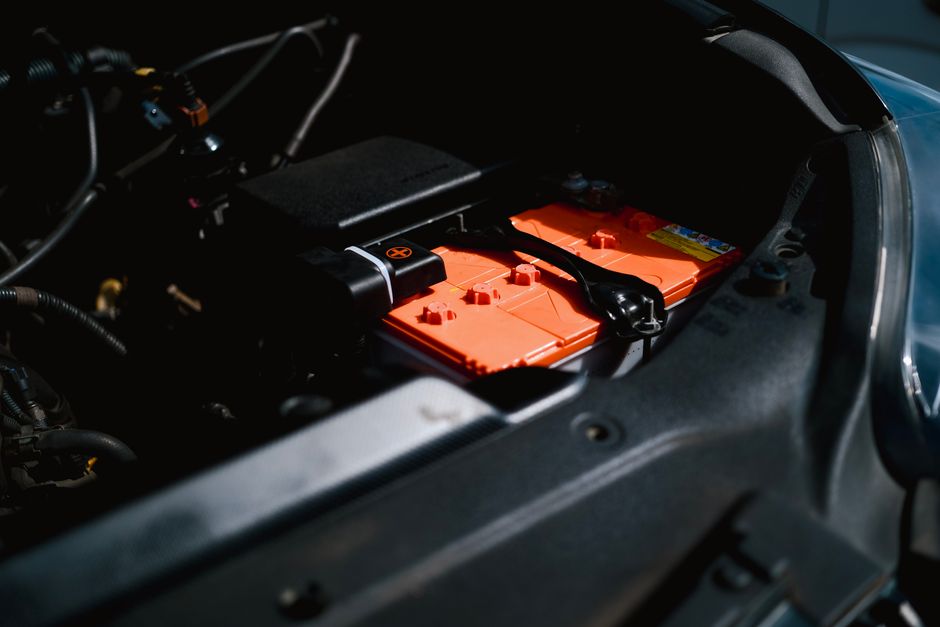
Before starting any work on the starter motor, ensure the battery is disconnected to prevent any electrical accidents. Locate the battery in the engine bay and use the appropriate tools to disconnect the negative terminal first, followed by the positive terminal.
2. Locate the Starter Motor
The starter motor is typically located near the bottom of the engine, attached to the transmission bell housing. Refer to your vehicle’s manual or online resources to locate the exact position of the starter motor in your specific vehicle model.
3. Remove the Old Starter Motor
Once the starter motor is located, use the necessary tools to remove the mounting bolts that secure it in place. Carefully disconnect any electrical connectors or wires attached to the starter motor before completely removing it from the vehicle.
4. Install the New Starter Motor
Position the new starter motor in place and secure it with the mounting bolts. Reconnect any electrical connectors or wires that were disconnected. Ensure that the starter motor is securely fastened and aligned properly before proceeding.
5. Reconnect the Battery and Test
After the new starter motor is installed, reconnect the battery by attaching the positive terminal first, followed by the negative terminal. Test the new starter motor by starting the engine to ensure it is functioning correctly before closing the hood and completing the replacement process.
Safety Precautions
Safety is paramount when working on a vehicle’s starter motor. Before starting any work, ensure the car is parked on a level surface and the engine is cool. Always wear protective gear such as gloves and safety glasses to prevent injury. Additionally, disconnect the car battery before starting any work on the starter motor to avoid electrical shocks or short circuits.
When working on the starter motor, be cautious of moving parts and hot surfaces. Take your time to properly follow the manufacturer’s instructions and double-check all connections and components before reassembling. If you encounter any difficulties or are unsure of any step, it is best to consult a professional mechanic to avoid any risks to yourself or damage to the vehicle.
6. Testing the New Starter Motor
Testing the new starter motor is crucial to ensure that it is functioning properly before reassembling everything. One way to test the starter motor is by connecting it directly to a power source. Make sure the motor is securely mounted and that all electrical connections are in place. Use jumper cables to connect the positive terminal of the starter motor to the positive terminal of the battery, and the negative terminal of the starter motor to the negative terminal of the battery.
Once the connections are secure, apply power to the starter motor by momentarily touching the other end of the jumper cables to the battery terminals. The starter motor should engage and turn the engine over smoothly. Listen for any unusual noises or vibrations that could indicate a problem. If the starter motor fails to engage or does not turn the engine over smoothly, there may be an issue with the motor itself or the electrical connections.
Conclusion
Replacing a faulty starter motor is a manageable task that can save you time and money. By following the steps outlined in this guide, you can successfully remove the old starter motor and install a new one with relative ease. Remember to always prioritize safety by disconnecting the battery and taking necessary precautions to avoid injury.
After replacing the starter motor, be sure to test it thoroughly to ensure it functions properly. If you encounter any issues during the replacement process or after installation, don’t hesitate to seek professional help. With proper tools, materials, and knowledge, you can successfully replace a starter motor and get your vehicle back on the road in no time.